After the successful completion of this project, it will send a push notification to a smartphone when Motion or fire detected by sensors viva esp8266 IOT module.
You probably know of the importance of a fire and motion alarm system in our homes, offices, and commercial buildings. This project is basically going to give you a Fire Alarm and motion detection Notification System which will detect nearby flame and inform you by sending a message provided by Blynk to your smartphone.
Safety Warning: You should NOT use this as a primary safety device. In fact, I wouldn’t wire this into any primary system at all, I would have this completely separate from any other smoke detection system. I’m running mine from the battery and have it as an entirely separate device in addition to my primary smoke detectors.
Components Required:
Contents
- NodeMCU ESP8266 x 1
- DFRobot Gravity: Analog Flame Sensor For Arduino ×1
- HC-SR501 Infrared PIR Motion Sensor x 1
- Jumper wires ×1
- Breadboard ×1
Before moving forward, let’s talk a bit about the NodeMCU ESP8266, which is an open-source IoT platform that includes firmware that runs on low-cost Wi-Fi enabled ESP8266 Wi-Fi SoC from Espressif Systems. It also includes hardware based on the ERP-12 module of the NodeMCU.
We’ll also be using a flame sensor to ‘detect’ the actual flames. There are, of course, many types of flame sensors but we’ll be using an infrared flame sensor for this project.
Connecting the Flame Sensor and Motion Sensor to the NodeMCU
To connect the flame sensor to the NodeMCU, follow the following steps.
- First off, connect the GND pin of the NodeMCU to the G pin of the flame and Motion sensor.
- Next, connect the Vin pin of the NodeMCU to the VCC(+) pin of the flame and motion sensor.
- Finally, connect the D1 pin of the NodeMCU to the D0 pin of the flame sensor.
- Connect Out pin of Motion Sensor to D2 pin of NodeMCU
Setting up the Blynk App
Before we can proceed, we have to set up the Blynk app.
- First off, download the app to your smartphone.
- Once downloaded open the app and log in using your email/FB.
- Once you log in, create a ‘’New Project’. Name the project as required.
- Next, choose the device you’re connecting i.e. NodeMCU ESP8266.
- You will receive an Auth Token via email. Copy it.
- Include a widget for ‘Push Notification’.
- Click the ‘Play’ button i.e. the triangle at the upper right corner.
- The Blynk app will notify you that the NodeMCU is offline.
- Now you’ll have to upload the complete code to your Arduino IDE. Also include the blynk library from here: https://github.com/blynkkk/blynk-library
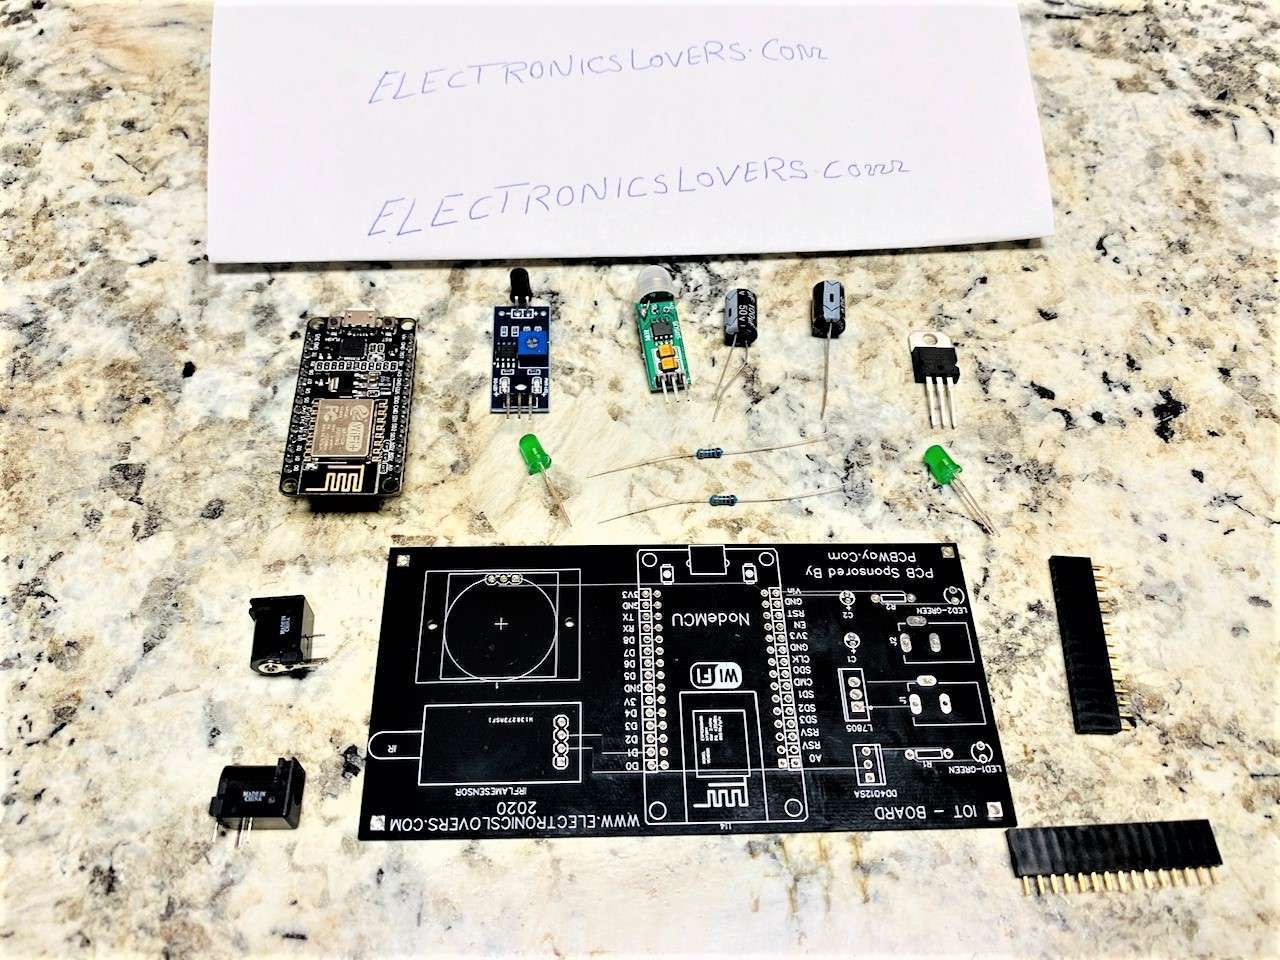
PCB for this project has been sponsored by PCBWay.com
PCBWay operates from its headquarters in China and provides its clients with high quality, tested PCBs. Also, as a PCB innovation company, PCBWay provides customers with a wide range of services such as Advanced PCB, FlexPCB, Rigid-Flex PCB, PCB assembly, and PCB design services. All the products are extremely cost-effective and their best feature is their high delivery rate. I received the board via DHL (They also offer shipping via UPS, TNT, EMS, FedEx, and Hongkong Post). The shipping process was very fast, I received the board within 5 days and the quality is absolutely amazing.
The PCBs arrived
The PCBs were excellent, quality robust, strong, and very beautiful. To prove the quality, I added details and the screen printing replied without problems.
Electronicslovers Remarks about PCBway
- Amazing service and Quality
- 100% guaranteed quality or rebirth.
- Good delivery time: 3 days by DHL.
- Online purchase order.
Project Testing on Bread Board:
The purpose of this step is to Make sure everything is working fine.
Components Assembling and Soldering:
Watch the Project Video and See How it WORKS
Code:
Copy and paste the following code to avoid errors in your project:
//Blynk Fire and motion Alarm Notification
#define BLYNK_PRINT Serial
#include <ESP8266WiFi.h>
#include <BlynkSimpleEsp8266.h>
BlynkTimer timer;
//Auth Code, Wi-Fi and others.
char auth[] = "SBDRfyDqqbkLA0kaV86LX5DuGEDZSGCG"; //Auth code sent via Email
char ssid[] = "C24888"; //Wifi name
char pass[] = "67391066";  //Wifi Password
int flag=0;
void notifyOnFire() //Flame Sensor Code
{
  int isButtonPressed = digitalRead(D1);
 if (isButtonPressed==0 && flag==0){
    Serial.println("Fire in the House");
    Blynk.notify("Alert : Fire in the House");
    flag=1;
}
  else if (isButtonPressed==1)
  {
    flag=0;
  }
}

void notifyOnSmoke() //SMOKE Sensor Code
{
  int isButtonPressed = digitalRead(D2);
  if (isButtonPressed==0 && flag==0){
    Serial.println("Alert!!! MOTION is Detected");
    Blynk.notify("Alert!!! MOTION is Detected");
    flag=1;
}
  else if (isButtonPressed==1)
  {
    flag=0;
  }
}

void setup()
{
  Serial.begin(115200);
  Blynk.begin(auth, ssid, pass);
  pinMode(D1,INPUT_PULLUP);
  pinMode (D2,INPUT_PULLUP);
  timer.setInterval(1000L,notifyOnFire);
  delay(100);
  timer.setInterval(1000L,notifyOnSmoke);
}

void loop()
{
  Blynk.run();
  timer.run();
}
Conclusion:
That’s all. You’ve now completed this very exciting IoT project. Be sure to let us know what you think! For more projects, check out www.electronicslovers.com.