A soldering clamp is an awesome tool, you can do soldering without touching the circuit or whatever you are soldering. This tool will help you while soldering, assembling or desoldering components on circuit board. An Idea Comes to my mind that why not to Use my Old 3D printer for the creation of 3d Model of soldering Clamp. Hopefully, you will like it because I have explained each and everything that how i made this 3D model of Soldering clamp.
COMPONENTS REQUIRED:
- 3d printer.
- Few Drops of Hot Glue.
- Metal wire.
3D Printer
The 3d printer is a printer which is used to print all you need in 3d, like a cap of a bottle of water, a vase, every tool, and costumes. My 3d printer is a cheap one, and it prints really good, but there are also others, more expensive, that print better than mine and they can print bigger objects. My experience with a 3d printer is awesome because I create lots of things, I printed also a fluke that it works, great!!
Learn How I Print 3d Model of soldering Clamp :
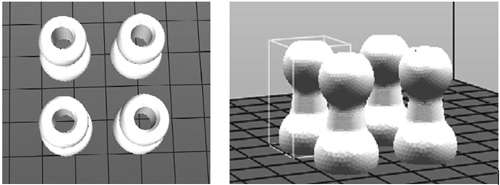
- print this module, in the number that you prefer, I printed 6 of them, this is the file that i used: (https://www.thingiverse.com/thing:1014657)
-
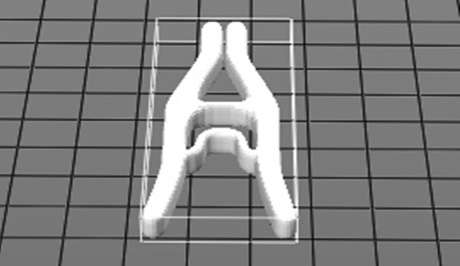
Now it,s time to print the clamp, i take some measurement and i found that the clamp is a little bit larger than the hole where it will be put inside, so i scale down a little bit so it can fit, this is the file that I used(https://www.thingiverse.com/thing:4227
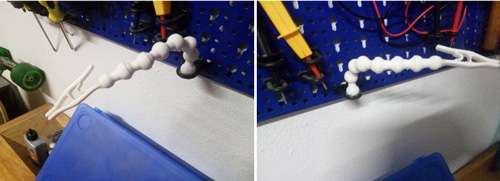
- Now It,s time to Join the two Module that it has to stick together in a proper way.
- Kindly Put Copper wire inside the hole to make it flexible kindly watch the video because i have shown all this process in the video.
- The last and Final part of this project is to glue the clamp to the last module, you have to attach that to the rounded part of the module.
Done! 3d Model of soldering Clamp
JOB IS DONE!!
I have Explained everything kindly watch this Video for further understanding to know how a final model will look like. The project took 2 hours of printing parts and 15 minutes of mounting altogether I like so much this project because it’s very useful.
Good luck!
This Article has written by MADE by Alemazzo | Email:Alemazzoli27@gmail.com